Download Instructions on how to Integrate R.O. Writer with Transend
When your shop uses R.O. Writer you can manage many different areas of your business from operations and marketing to inventory and parts ordering. Transend is here to help with quick and accurate parts lookup and ordering for all your transmission, driveline, and air conditioning part needs for the exact vehicle you are working on. Integrate your R.O. Writer account with Transend from Transtar to get started today.
Steps to Integrate R.O. Writer and Transend
R.O. Writer has built an integration with Transtar’s e-commerce platform Transend. The integration allows you to search for parts directly from an open ticket and post the parts to that ticket without ever leaving R.O. Writer.
You configure R.O. Writer by entering your account details from Transtar. When you created your account with Transtar on Transend, they should provide you with your access credentials. R.O. Writer cannot provide you with Transtar account information; you must contact Transtar to obtain this information.
Step 1 – Check Your License for Transtar
Transtar is a licensed feature. When you check your license details, you should see Transtar in your Licensed Options. If this feature is not included in your Licensed Options, you may need to refresh your license.
If you would like to add this feature, please contact the R.O. Writer Sales team to update your license.
Step 2 – Configure the Transtar Supplier With an Interface
You can create only one Transtar interface.
R.O. Writer cannot provide you with your account information; you must obtain your account information directly from the supplier.
Complete these steps:
- Open Configuration.
- Click Configuration menu > Parts > Suppliers.
- Select Transtar in the Supplier dropdown list.
- Enter the supplier information on the main Supplier window.
- Click Add in the Supplier Interfaces section.
- On the Supplier Interface window, select Transtar in the top half of the window.
- Enter the interface information.
- Click Save. The interface window closes.
- The saved Interface Name appears in the Supplier Interfaces section on the main Suppliers window.
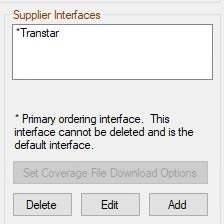
The Set Coverage File Download Options button is disabled because you do not download coverage (.MCL) files for Transtar.
- Click Save again on the main Supplier window.
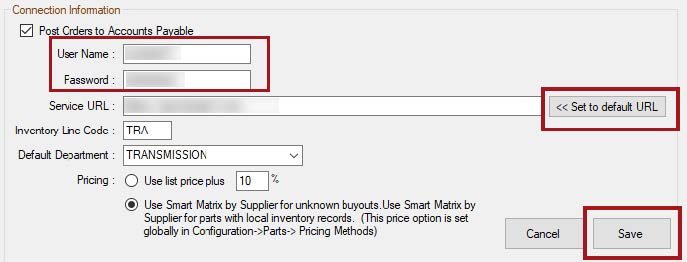
Transtar Interface Connection Information
You must obtain the access credentials from Transtar; R.O. Writer cannot provide you with your account information.
The following describes the Transtar interface options.
Post Orders to Accounts Payable
Select this option to automatically post part orders with Transtar to Accounts Payable. You will be prompted to post to Account Payable during the order process.
User Name and Password
Enter the login credentials you received from Transtar for your account.
Service URL
The URL is the website or network location of the supplier’s catalog. Click the Set to Default button. R.O. Writer enters the correct URL for the supplier in the field automatically.
Use the default URL unless your account uses a different URL.
-R.O. Writer 3.0 and higher interfaces with Transtar’s Transend™ platform.
When you click the Set to Default URL button, the correct URL for the platform appears in the Service URL field.
Inventory Line Code
Transtar does not use line codes. However, you can enter a line code for the entire interface. Keep in mind that R.O. Writer searches your local inventory by part number/line code combination. R.O. Writer recommends the following:
-If there are no Transtar parts in your local inventory
Enter a line code of “TRA”.
If you decide to stock Transtar parts at some point, this line code ensures that those parts won’t accidentally match existing part records.
The line code is added to non-stock Transtar parts when posted to tickets.
-If there are Transtar parts in your local inventory with a line code assigned
Enter that line code here.
The line code is added to non-stock Transtar parts when posted to tickets.
-If there are Transtar parts in your local inventory with NO line code assigned
Do NOT enter a line code for the Transtar interface.
The line code is NOT added to non-stock Transtar parts when posted
NOTE: Because Transtar does not use line codes, line codes are never sent to Transtar when ordering parts. Only the part number is sent to Transtar when ordering in Smart eOrder.
Default Department
Choose the default department to use for Transtar. This list contains all parts departments.
TIP! You should create a parts department specifically for Transtar and select as the default department in this list.
Pricing
The pricing options determine the pricing method R.O. Writer uses for Transtar parts in the department selected in the Default Department dropdown list.
-Use List Price __% uses the list price percentage. This option is selected by default.
-Other pricing options appear depending on the Parts Pricing Method selected for outside purchases in Configuration. These options are:
Use Default Pricing (Cost Plus Multiplier)
Smart Matrix by Supplier
Smart Matrix by Department
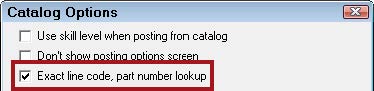
Part Lookup Setting
In Configuration, open repair order Catalog Options (Configuration menu > Repair Order > Catalog Options) and check Exact Line Code, Part Number Lookup.
Local Inventory Coverage List
If you use Smart eCat, the Local Inventory coverage list is based on Epicor data. Transtar does not have any parts listed in the Epicor catalog; therefore, you cannot add Transtar to your Local Inventory coverage list.
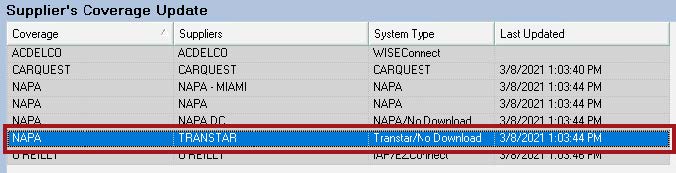
In addition, the coverage file download process is disabled for Transtar.
-In supplier setup, the Set Coverage File Download Options button has been disabled.

-In Smart eCat Update Coverages, the Transtar supplier displays “Transtar/No Download” in the System Type column.
Transtar parts in your local inventory appear in search results if the part number and line code match. The Available column of the part line displays “Stock [#on hand]” when the Transtar part is available in local inventory.
Step 3 – Enable Access to the Transtar Catalog
If you don’t see Transtar in the Quick Launch or Smart eCat toolbar, you need to enable
access to Transtar in the Catalogs section of the Quick Launch in Configuration.
Complete these steps:
- Open Configuration and click File menu > General Options.
- Check the Transtar box.
- Click OK and close Configuration.
- Open R.O. Writer main module.
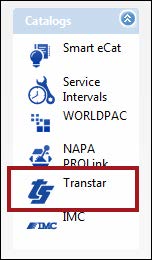
- Transtar appears in the Catalogs section of the Quick Launch.
Accessing Transtar
You can access Transtar from an open ticket by:
Clicking the Transtar logo in the Quick Launch.
-Clicking the Transtar toolbar button inside Smart eCat.
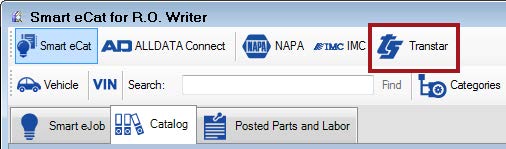
When you click either button, Smart eCat always opens in Smart eCat (even if you are not licensed for the full Smart eCat catalog).
NOTE: If you access Transtar without a ticket open, you can search the Transtar catalog but you cannot post parts to any ticket.
Vehicle Selection
Transtar uses ACES vehicle information. When you access Transtar, R.O. Writer connects to Transtar and searches for the vehicle based on the information in the open ticket.
-If a match is found, the part search window opens in Smart eCat.
-If the vehicle is not found, the ACES Vehicle Selector window opens where you
select the vehicle information.
When the vehicle information is found successfully, the Transtar vehicle information appears in the status bar at the very bottom of the Smart eCat window.

For details, click the following link: Adding ACES Information on the ACES Vehicle Selector Window.
To Select a Different Transtar Vehicle
If you want to use a different vehicle than the one in the ticket, click the Reselect Transtar Vehicle button. The ACES Vehicle Selector window opens where you can choose a new vehicle.
Searching for Transtar Parts
After the Transtar vehicle is selected, you search for and select the parts to post to the
ticket.
To Search Using the Categories
Complete these steps:
- Open a ticket.
- Access Transtar.
-If the vehicle on the open ticket matches the Transtar vehicle information all the way to the transmission type, the part selection window opens.
-If the vehicle on the open ticket does NOT match the Transtar vehicle information all the way to the transmission type
-The ACES Vehicle Selector window opens where you can select the vehicle. - When the vehicle is found, the part selection window opens.
- The Categories and Sub Categories for the Transtar vehicle appear.
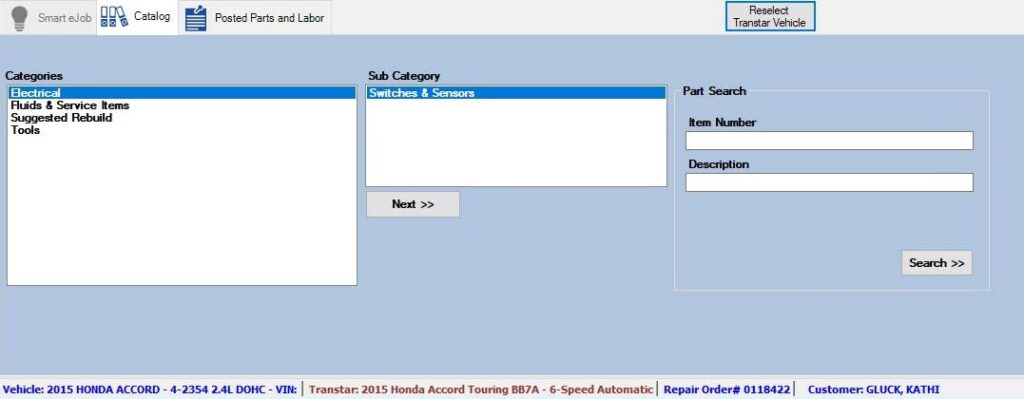
- Choose the parts you want and click Next. R.O. Writer searches the Transtar catalog for matching parts.
- The matching parts appear on the Catalog tab.
- Check the box for the part you want.
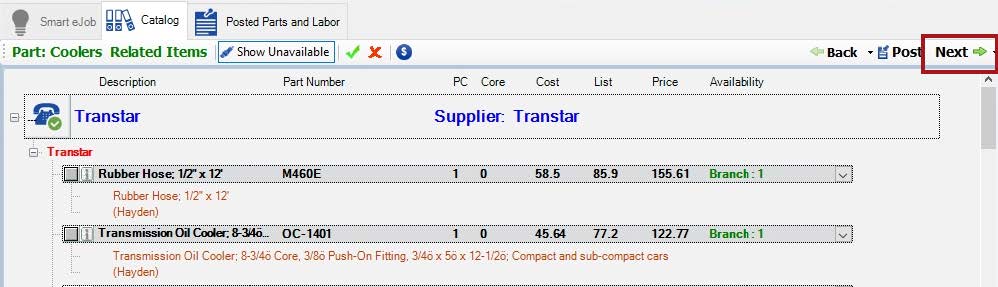
If the part is in your local inventory, the Available dropdown list says “Stock: [# on hand]”.
- Click the Next toolbar button to move to the next step.
To Manually Search for Transtar Parts
On the Catalogs tab, instead of using the groups, you can search for parts manually in the Part Search section.
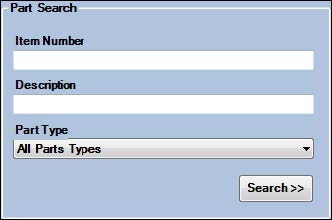
Enter an Item Number, Description, and Part Type from the dropdown list, and then click Search.
Exploded Transmission Diagrams
When Transtar opens in Smart eCat, a new section appears on the right side of the window. This is a list of all exploded diagrams of transmissions available from Transtar.
The Exploded Diagrams by Transmission list remains the same regardless of the Category and Sub Category selected.
Double-click the transmission number to open a window that displays the exploded diagram for the transmission number.
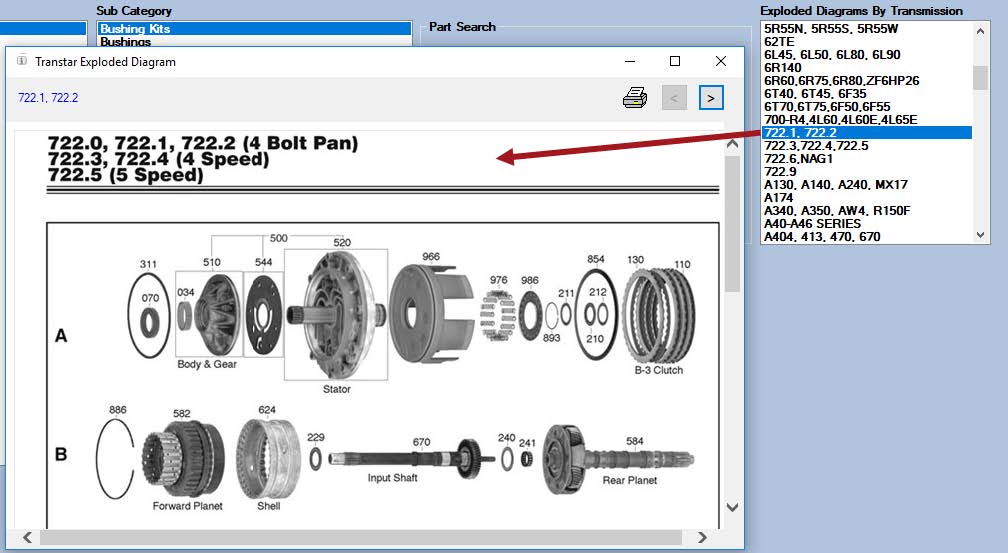
On the diagram window, you can use the following tools to navigate through the diagram:
-Click the Print button to print the diagram.
-Click the left and right arrow buttons to move through the pages.
-The arrow buttons are active only if the diagram has more than one page.
-Use the horizontal and vertical sliders to see the entire diagram.
You can open multiple diagrams and leave the diagram windows open.
These windows stay open until you close them manually. However, these windows will close when you close R.O. Writer.
Search Results Window
This section describes the most common parts of the window.
Catalog Toolbar
The toolbar at the top of the Catalog tab contains several options.
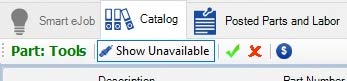
The following describes the catalog toolbar options.
Part Displays the selected Transtar category and/or subcategory.
Show/Hide Unavailable Click to show or hide unavailable parts.

Selects all parts.

De-selects all parts.

Click to show or hide the cost in the search results. The Cost displays by default, when the Cost toolbar button is clicked, the Cost and List
Navigation Buttons
These buttons appear in the top right corner and help you move through the windows.

-Click Back to not post the part and return to the search window.
-Click Post to post the part to the Posted Parts and Labor tab but stay on the current window.
-Click Next to post the part to and move to the Posted Parts and Labor tab at the same time.
Part Information in Search Results
The following describes the column for each part row.
Click on this box to select or de-select a part.

Part is not selected.

Part is selected.

The presence of this button indicates that there is an image available for this part. Click the “i” button to see the image:
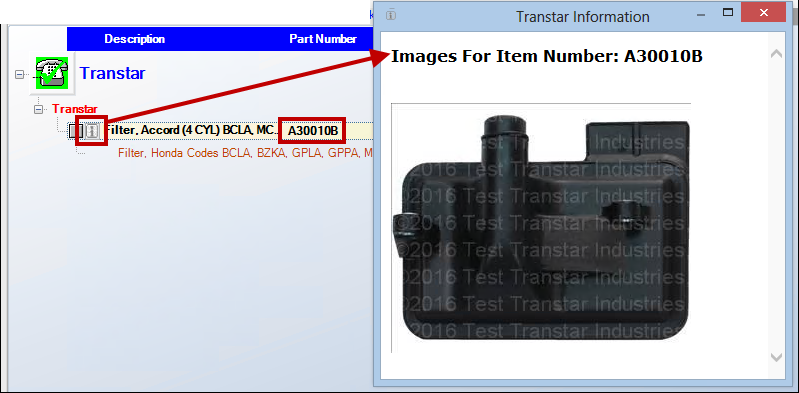
Description The part’s description.
Part Number The part number.
PC The number of pieces needed for the part (i.e., the quantity). For example, brake pads usually come in a pack of two; therefore, there are two pieces per part number.
To enter a new number, click in this field, type in the new number, and click in an empty space on the screen.
Core The core cost (if available or required).
Cost The cost if available. If not available, $0.00 displays.
List The list price.
Price The price to the customer. You can change the price by clicking inside the field and typing in a new price.
Click on an empty space on the window outside the Price field and the new price appears.
Availability
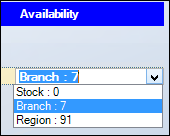
The location of the part and its available quantity in that location. The format is as follows: Location [Quantity].
By default, the closest location with on-hand quantity appears on the line.
Click the down arrow to see all available locations.
Stock – Your local inventory (part number/line code must match).
Branch – The location closest to you. This is usually where you buy most of your parts.
Region – The wider Transtar system.
Specific location of the part. Additional availability information appears as a separate part line for the part.
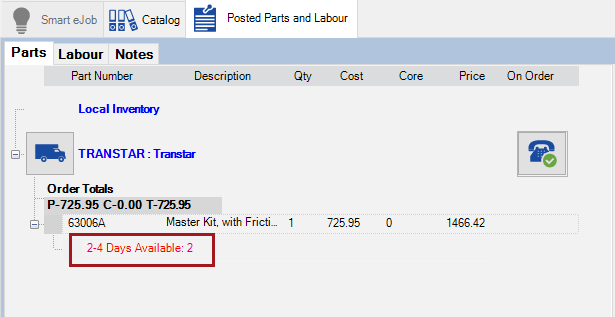
The availability information also appears with the part on the Posted Parts and Labor window.
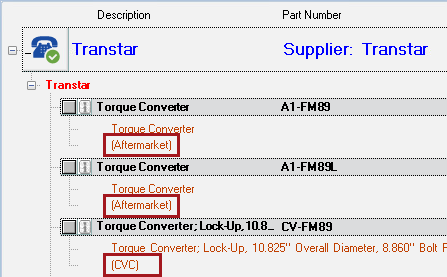
Part Line Information
Additional information appears as separate lines under each part.
Part Origin
The part line with information in parentheses and often indicates the part’s classification. For instance, if the part is a specific brand, OEM, used, aftermarket, etc.
The text usually corresponds to the letters before the part number.
Availability and Location
On the Catalog tab, the specific location appears in the Available dropdown list. The part availability details also appear on a separate line for each part.
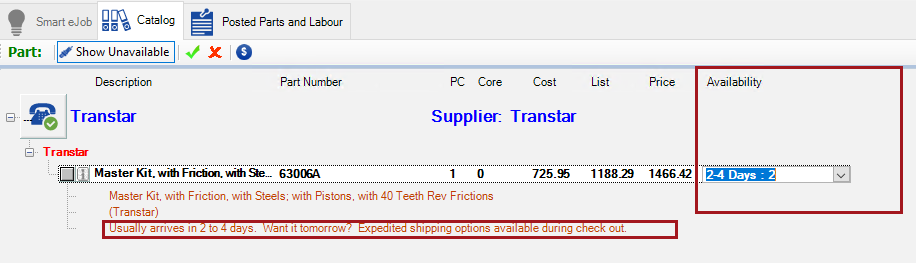
The availability information also appears with the part on the Posted Parts and Labor tab.
If There Are No Parts for the Vehicle
Occasionally, there are vehicles in the Transtar database whose transmission type has no parts associated with them. If one of those vehicles is selected for the ticket when you click access Transtar, a message appears notifying you that no Transtar parts are available for that vehicle.
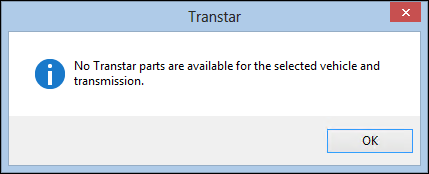
Click OK and the parts selection window opens, but there is nothing in the list to select. If this happens,
-Check the Transtar website. Because R.O. Writer has already queried Transtar, there shouldn’t be any parts there either; however, you can definitely double-check the site.
-Click the Reselect Transtar Vehicle button to choose another vehicle and search again.
-The ACES Vehicle Selector window opens where you can select another vehicle. Your new selections appear in the Transtar vehicle section at the bottom of the window.
Posting Transtar Parts to an Open Ticket
After you have searched for and selected your parts, you post them to the Posted Parts and Labor tab.
Complete these steps:
- When you have selected all parts and they appear on the Posted Parts and Labor tab, select the posting options in the right column.
- Select the Technician (optional)
- Choose the way parts and labor are posted to the ticket.
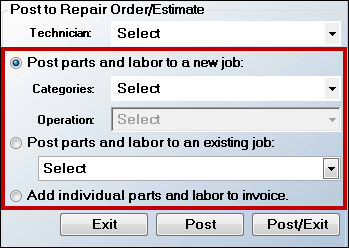
The following describes the posting options in the right column of the Posted Parts and Labor tab.
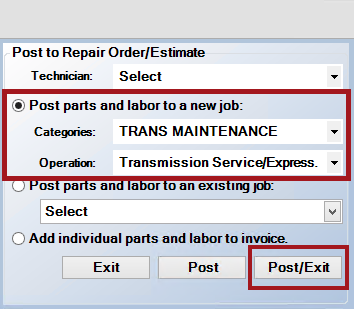
Post Parts and Labor to a New Job Posts the parts and labor to a new job that is not currently on the ticket. Select the job in the list(s).
The dropdown lists contain all labor categories and operations.
-Category (required)
-Operation (optional)
Post Parts and Labor to an Existing Job Posts the parts and labor to a job that is currently on the
ticket. Select the job in the dropdown list.
The dropdown lists contain only jobs already posted to the open ticket.
Add Individual Parts and Labor to Invoice Adds the parts and labor as separate lines.
-Each part is added as a separate item.
-All labor jobs are added to the same group.
Select this option if the jobs are not included in the same labor operation.
- Click the Post/Exit button.
5. Smart eCat closes and the part(s) appears on the ticket.
Ordering Parts from Transtar
When Transtar parts are on a repair order, you can
-Order them directly from the open repair order in Smart Order.
-Build purchase orders in Inventory > P.O. Management.
Ordering Guidelines
Keep in mind the following when ordering Transtar parts in R.O. Writer:
-Rebuilt transmission assemblies and complete torque converter assemblies cannot be ordered through this interface at this time.
-Pricing is subject to standard Transtar pricing terms. The price at the time of the order may not be the final price because Transtar may add shipping charges from the Branch or Region.
-When posting to Accounts Payable in Smart eOrder, all parts must be ordered from the same location. If you order parts from multiple locations – both Branch and Region – you need to post an invoice to Accounts Payable for each location, even if all the parts are on one repair order.
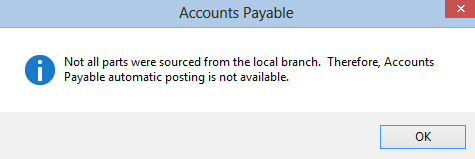
If this occurs, click OK. Then, uncheck the boxes of the all the Region parts or all the Branch parts to de-select them. When only the Region parts or only the Branch parts are selected, click the Post/Exit button again.
To Order Parts in Smart eOrder
Smart eOrder is an R.O. Writer utility that lets you order parts directly from open tickets In Smart eCat (on the Posted Parts and Labor tab before posting the part to the open ticket).
In Smart eOrder (after posting the unordered part to the open ticket).
Complete these steps:
- Open the repair order.
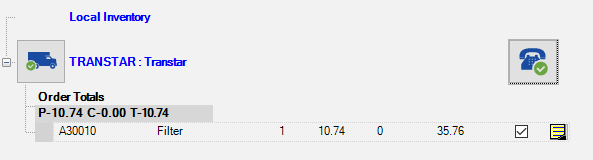
- Click the Smart eOrder button in the Quick Launch . The Transtar parts from the repair order appear on the Smart eOrder window.
- Click the Truck button to place the order.
– The Order Options window opens.
– The purchase order number is the repair order number. You can enter another number but it is not recommended.
– You can type a message for the purchase order in the white box. - Click OK to place the order.
- The post to Accounts Payable window opens only IF The Post Orders to Accounts Payable option is selected in the Transtar electronic interface.
AND
All parts are available from the Branch.
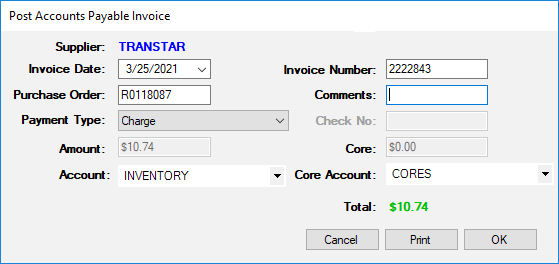
- R.O. Writer generates the Purchase Order and Invoice Number.
- Click OK to post these orders to Accounts Payable. “On Order” appears below the part on the Parts tab.
- Click the truck button to contact Transtar and place the order. When the order is successful, the truck button shows a green checkmarks.
- Click the Post/Exit button to update the parts on the open repair order. Smart eOrder closes and the parts on the repair order now appear black.
- Double-click on one of the parts to open it. On the Edit Parts window, The Invoice # appears and cannot be changed because the part has been posted to Accounts Payable.
– The To Order box is unchecked because the part has been ordered. - Click OK to close the part.
To Order Parts in P.O. Management
P.O. Management is a tool in the Inventory module that allows you to build purchase orders for parts on different repair orders at one time. You can use it to create purchase orders for stocking orders.
For details, click the following link: Purchase Order Management
Transend is a trademark of Transtar Industries, Inc.
Company Information Support Sales
Constellation R.O. Writer Inc.
11350 McCormick Rd.
Plaza 3, Suite 200
Hunt Valley, MD 21031
www.rowriter.com
Support
Phone: (800) 881-5859
https://support.rowriter.com
Sales
Sales:(888) 928-9769
Business: (561) 904-7300
R.O. Writer 3.0
The “R.O. Writer” name and logo are properties and registered trademarks of Constellation R.O. Writer nc.
Copyright © 2022 Constellation R.O. Writer Inc. All Rights Reserved.
Any reproduction, redistribution, and/or other use of the information, images, graphics, content, and material, in whole or in part, contained herein without the express written permission of an authorized representative of Constellation R.O. Writer Inc. is prohibited. All other trademarks are the property of their respective owners.